Announcements
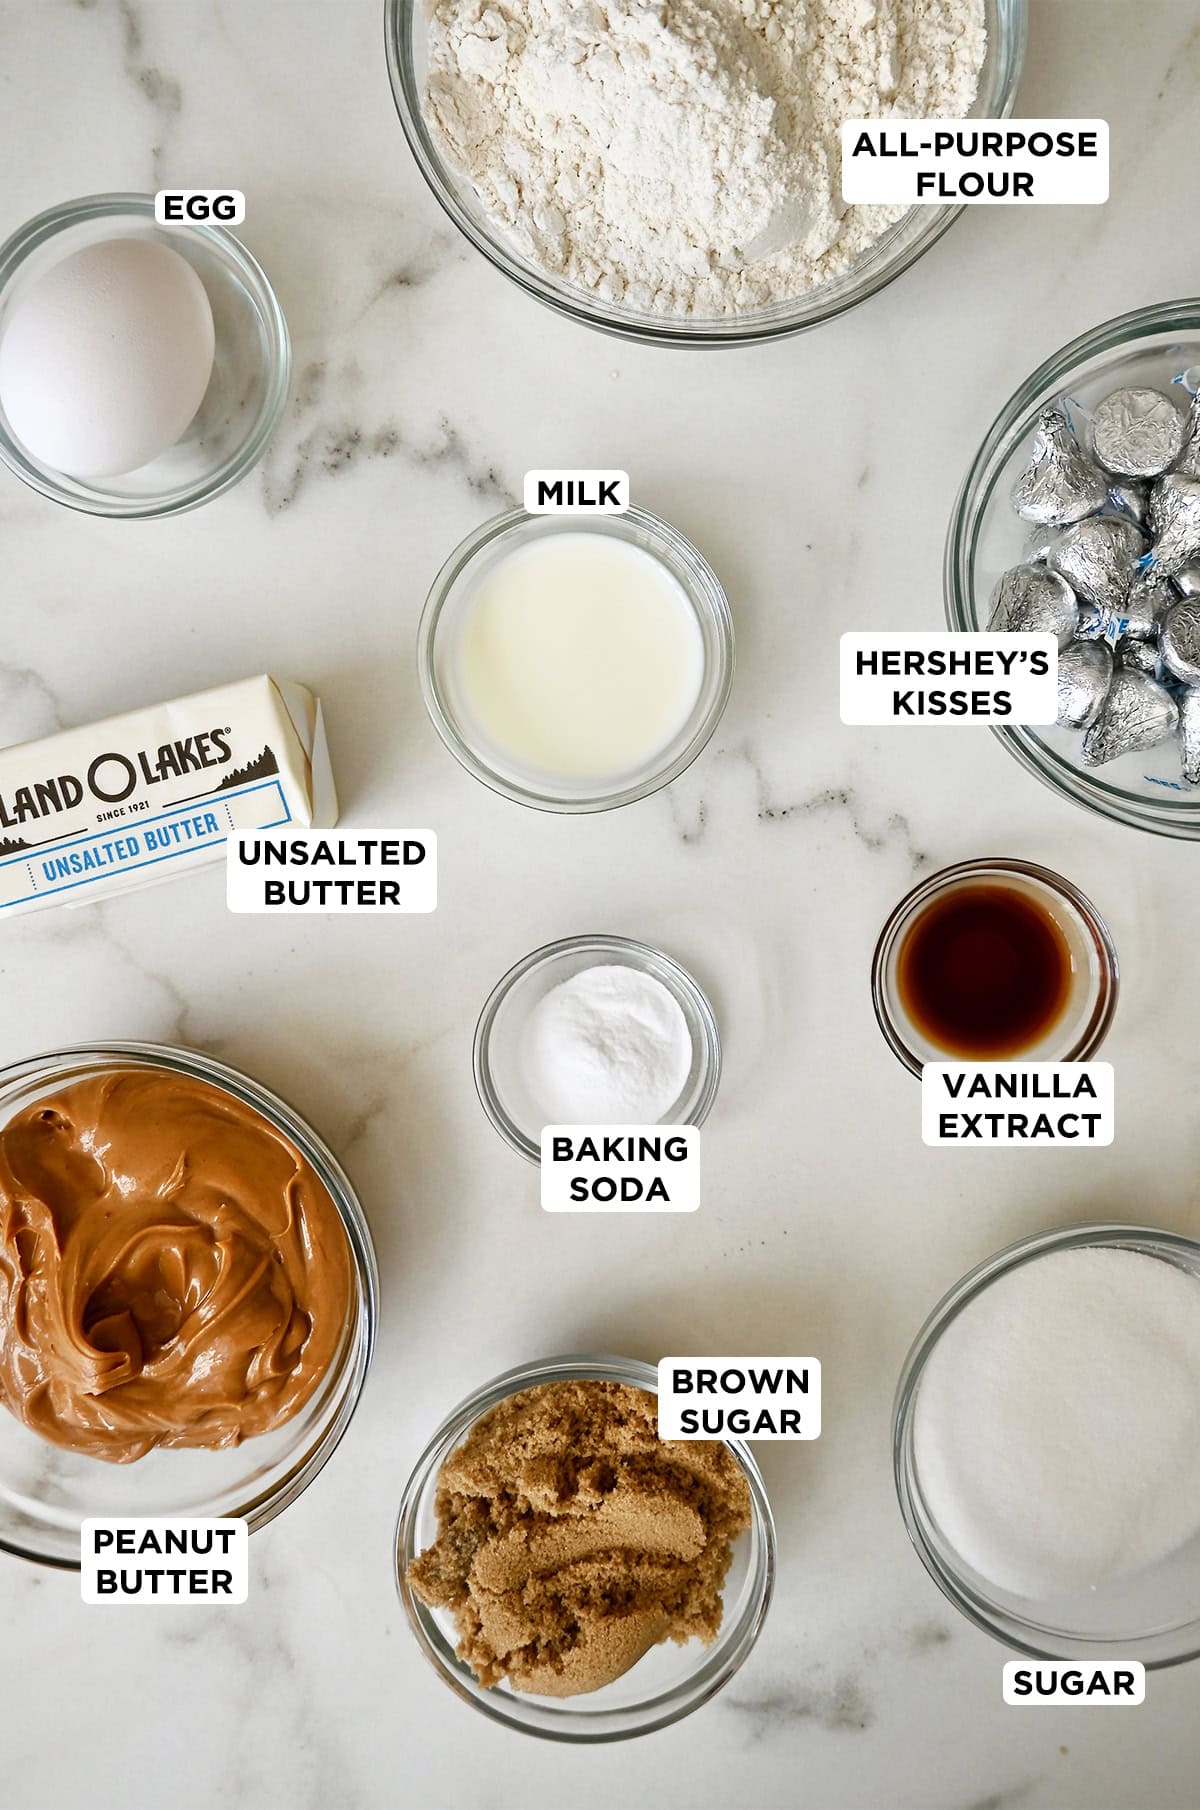
- Peanut butter: Both creamy and crunchy work for this recipe, but skip natural peanut butter, which tends to separate and lead to an oily, unpredictable dough. (My go-to brand is Jif; it’s what I always use when making my buckeye balls or peanut butter chocolate chip cookies.)
- Butter: Make sure your butter is properly at room temperature before creaming it with the sugars. This is key to the cookies holding their shape without any chilling. (If you’re unsure what “room temp butter” actually means, or need to get it there fast, my guide on how to soften butter quickly breaks it all down.)
- Granulated sugar and light brown sugar: Using both sugars gives a perfect balance: crisp edges from granulated sugar and extra-soft centers from the brown sugar. The brown sugar also helps those signature crackly tops form. You’ll also need a little extra granulated sugar for rolling the dough balls before baking.
- Egg: Just one egg binds the dough and keeps the cookies chewy.
- Milk: A splash of milk keeps the dough smooth and easy to roll, and is part of what makes these truly the best peanut butter blossoms.
- All-purpose flour: The sturdy base that gives the cookies structure. Measure your flour by spooning and leveling so the cookies stay soft and tender.
- Vanilla extract and salt: Both balance the sweetness and enhance the peanut butter flavor.
- Baking soda: For lift.
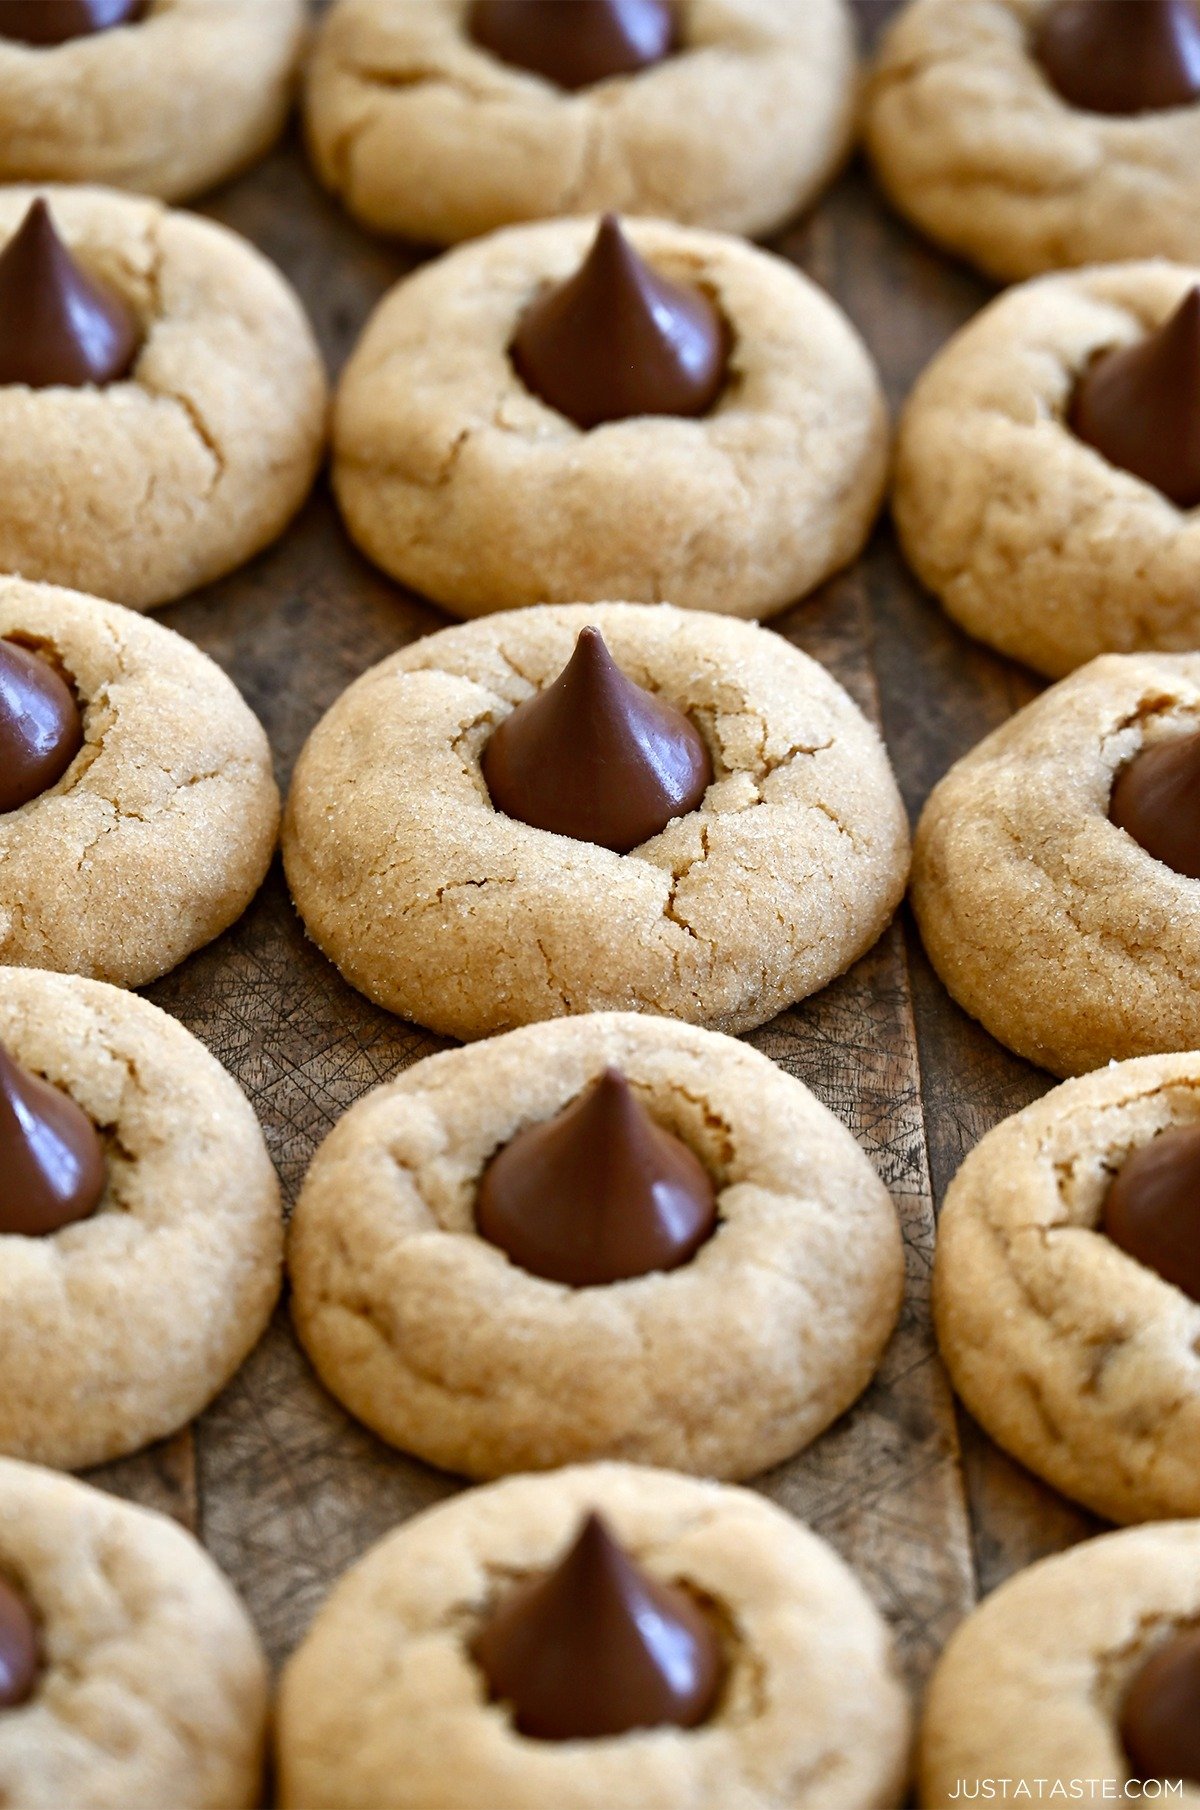
- Hershey’s Kisses: The classic finish! Milk chocolate kisses are the traditional choice, but dark chocolate or any seasonal flavor works great, too. You can even swap in mini Reese’s peanut butter cups, like I do in my peanut butter cup cookies.
See the recipe card for full information on ingredients and quantities.
Before you dive in, go ahead and unwrap the Hershey’s Kisses so you’re not scrambling when the cookies come out of the oven. This is also one of my favorite holiday cookies to make with little ones: rolling the dough into balls, coating them in sugar, and gently pressing the chocolate kisses into the warm cookies are all great tasks for little hands. Here’s exactly how to make them, step by step:
- Whisk together the dry ingredients. In a medium bowl, whisk the flour, baking soda and salt. Set it aside.
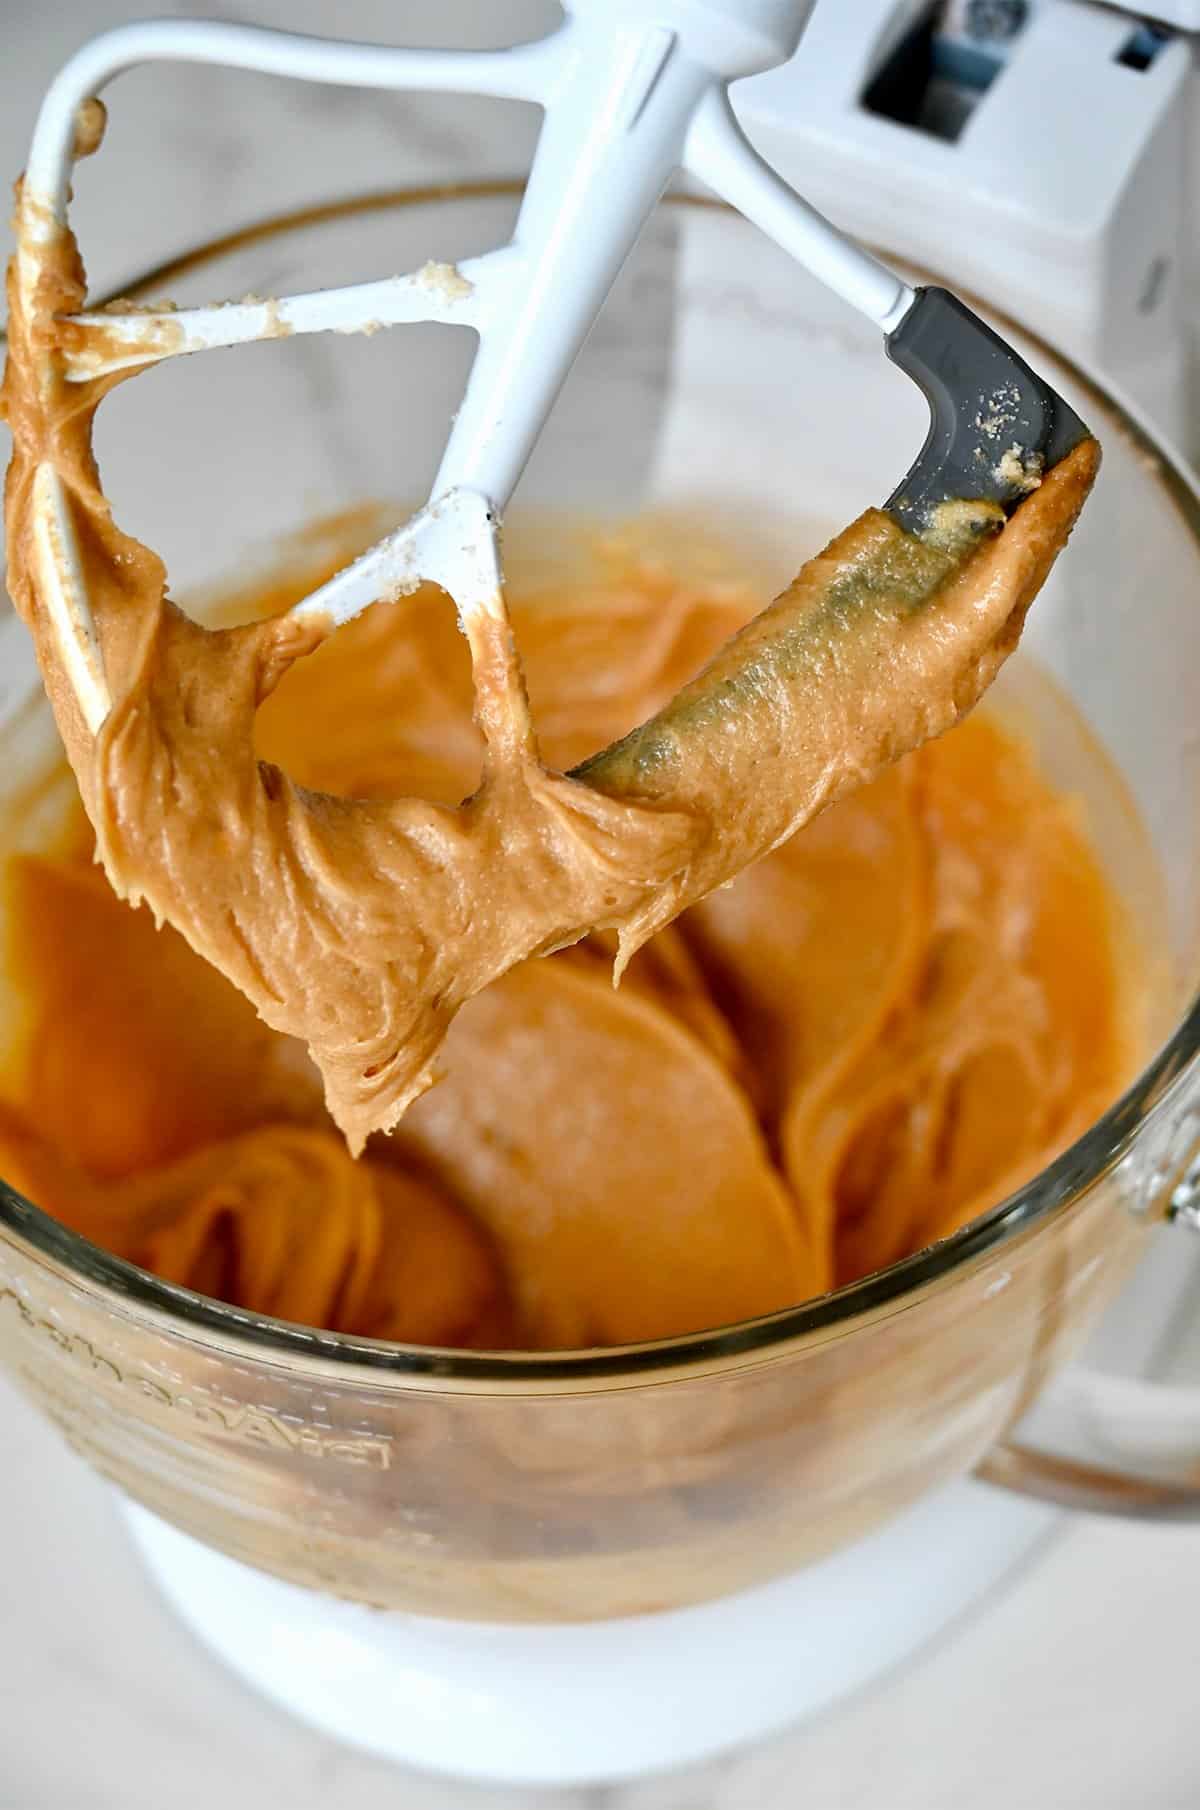
- Cream the butter and sugars. Beat the room temp butter with the granulated sugar and brown sugar. Don’t rush this step. You want the mixture to look pale and fluffy, which will take a good 2 to 3 minutes. Under-creamed butter is the #1 culprit behind cookies that spread.
- Mix in the wet ingredients. Add the egg and beat until combined, then mix in the peanut butter, milk and vanilla extract. The dough should look smooth and cohesive.
- Add the dry ingredients. Mix in the flour mixture just until you no longer see streaks of flour. Overmixing can lead to tough cookies. And be sure to scrape the bottom of the bowl while mixing; that’s where sneaky pockets of flour like to hide.
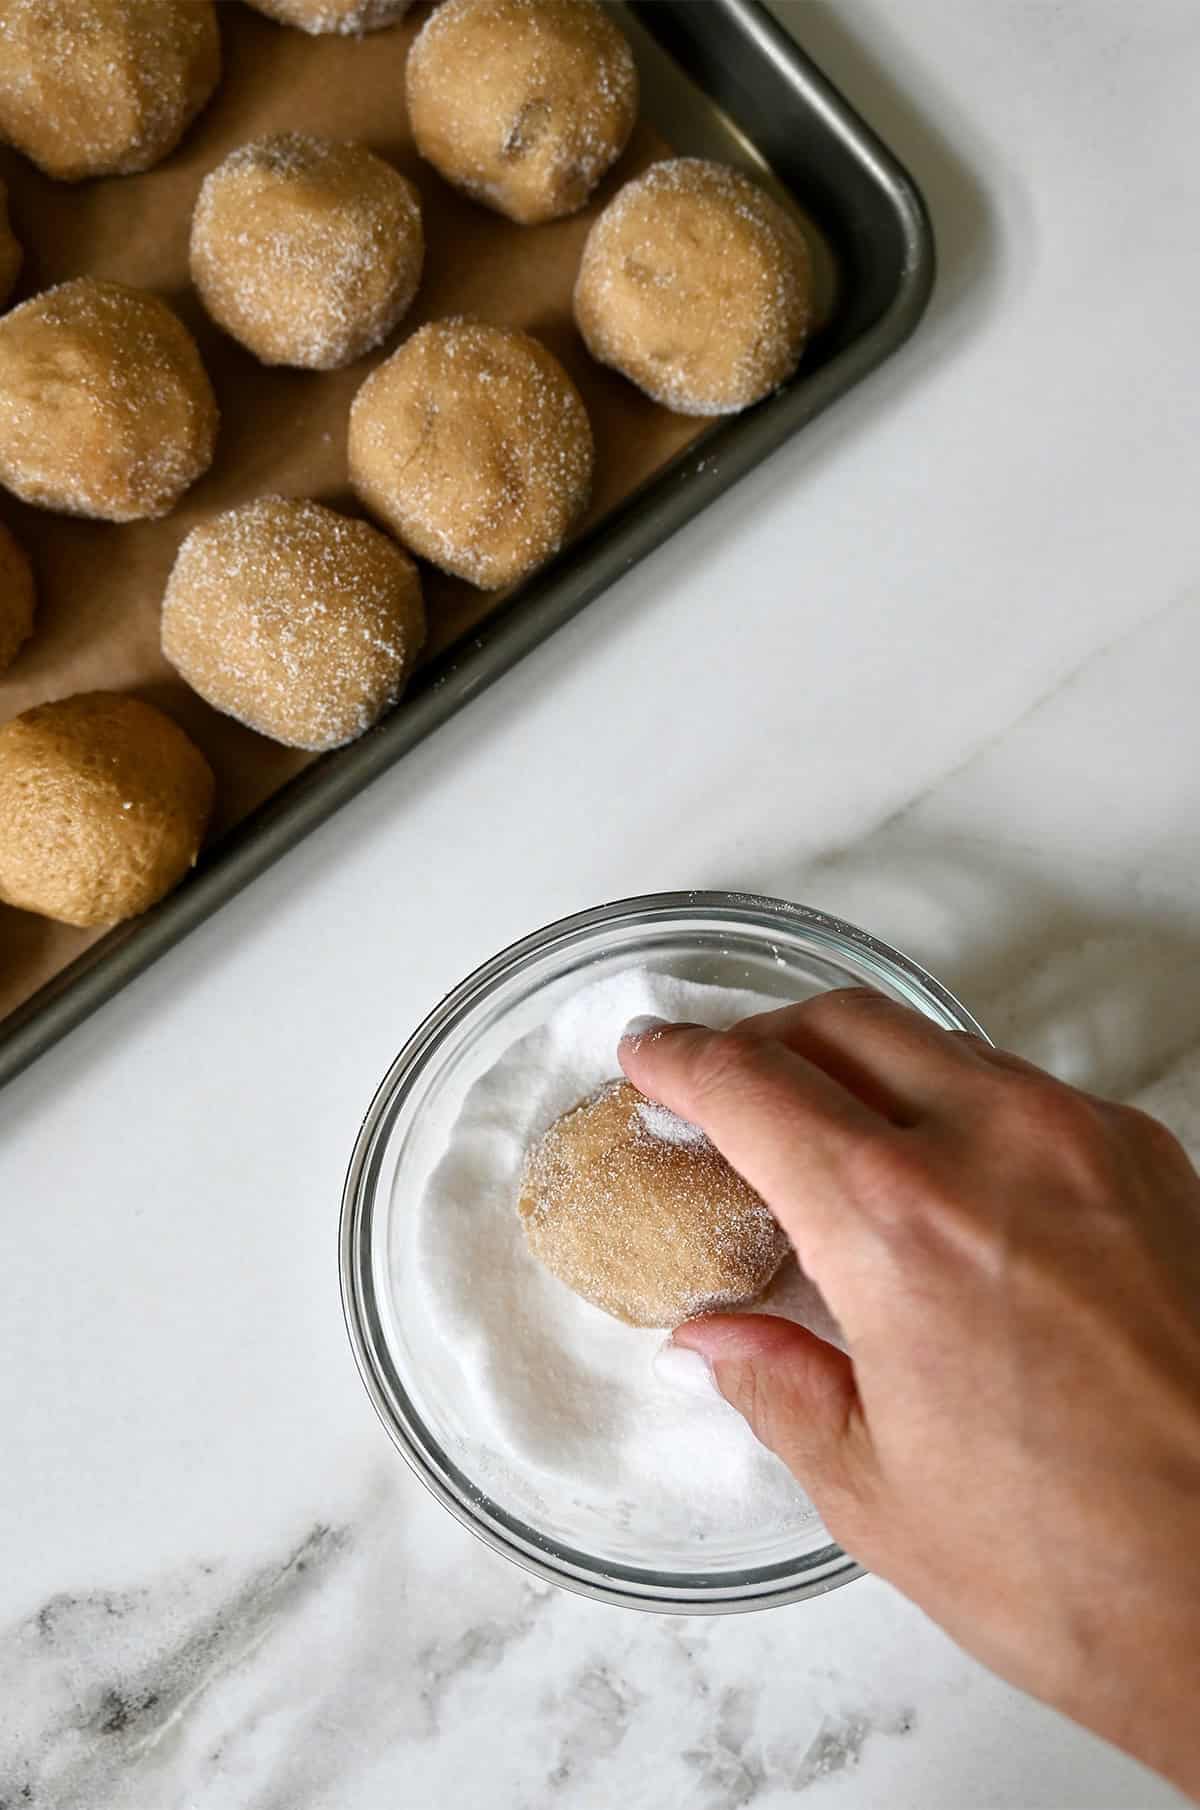
- Scoop and roll the dough into balls. I use a 2-tablespoon cookie scoop for even portions, but you can make the dough balls as big or small as you’d like. The key is to keep them roughly the same size (about 1 inch is great) so they bake evenly.
- Roll in sugar. Add ½ cup granulated sugar to a bowl and roll each cookie dough ball in the sugar so it’s coated all around. Some might say this step is optional, but it’s what gives each peanut butter cookie a little sparkle and crunch. You could even use colored sanding sugar, like red or green, if you’re feeling festive!
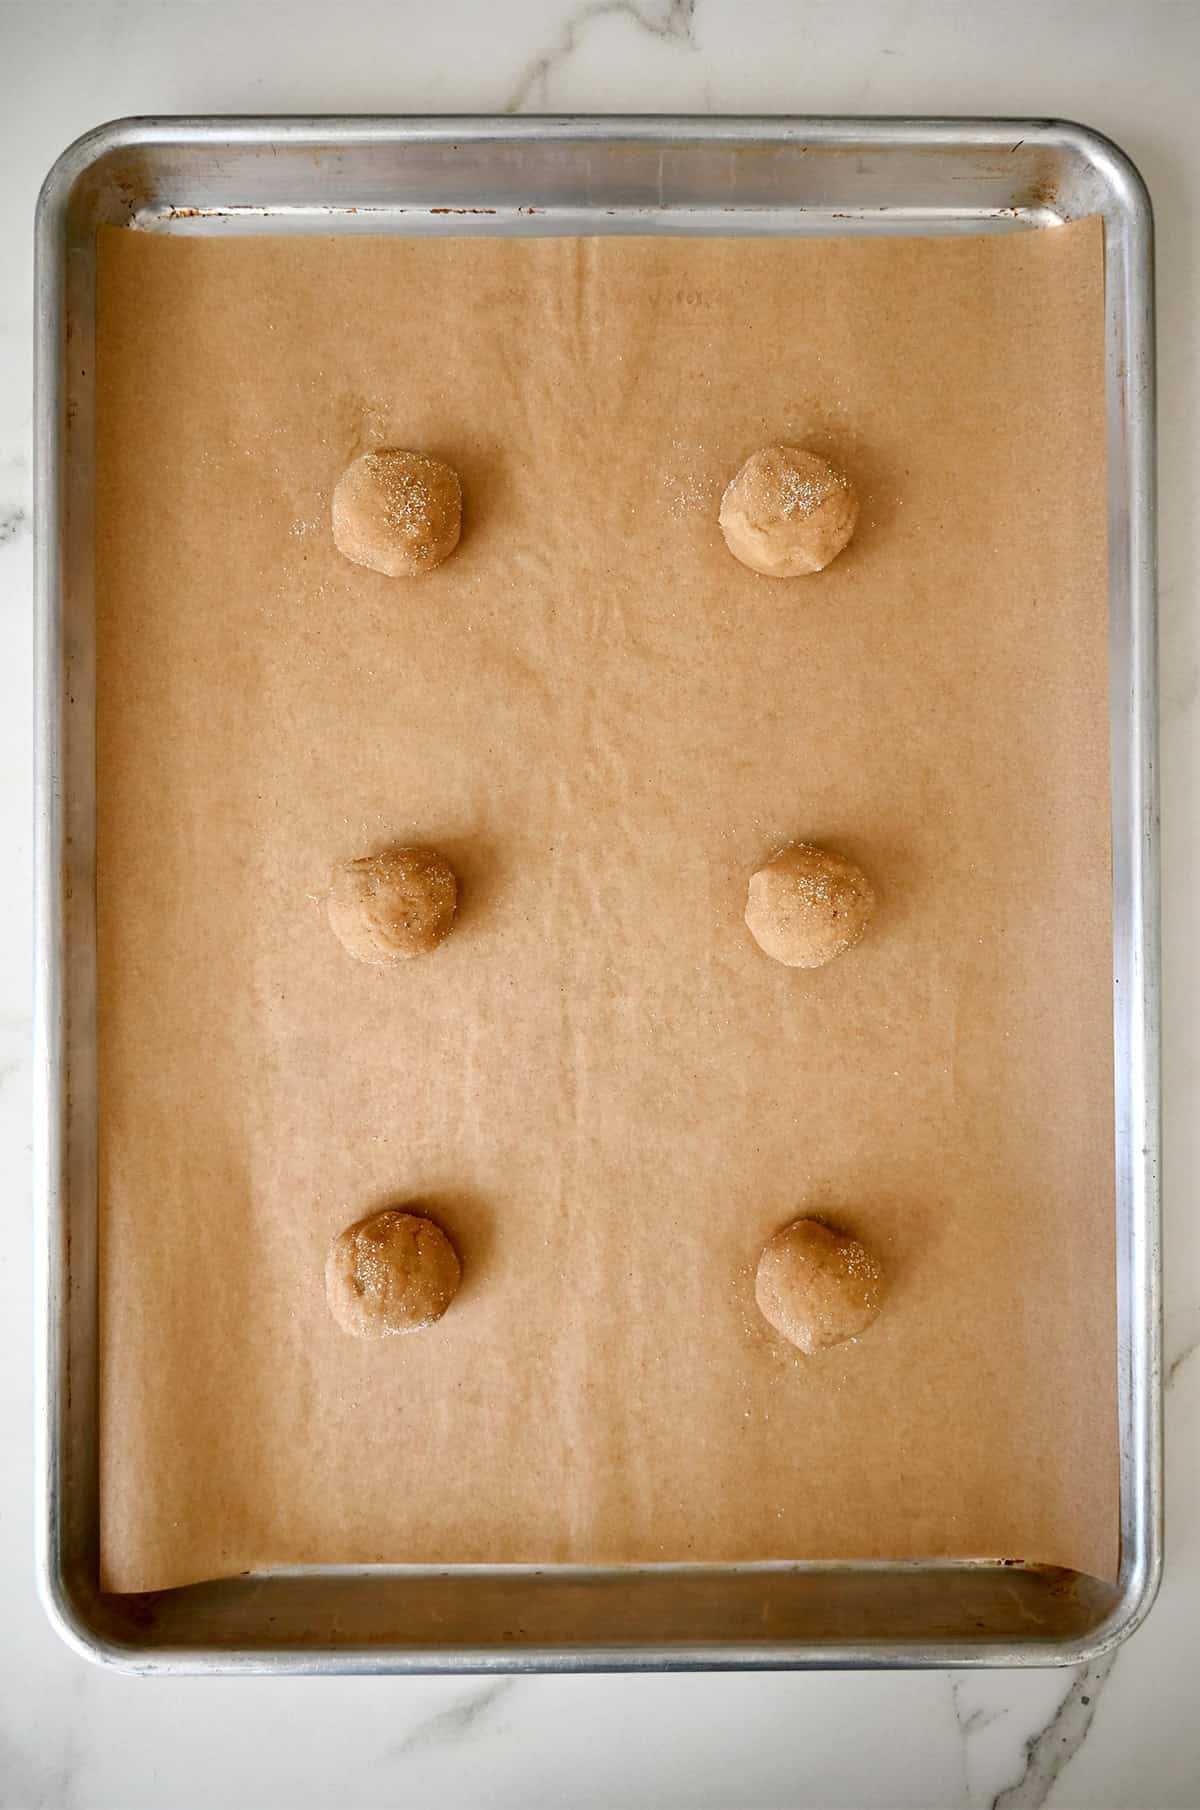
- Bake. Line two cookie sheets with parchment paper. Space the peanut butter blossom dough balls on the prepared cookie sheet about 2 inches apart. Bake in a 350°F oven until the edges look set and the tops are puffed. This takes about 8 to 10 minutes in my oven.
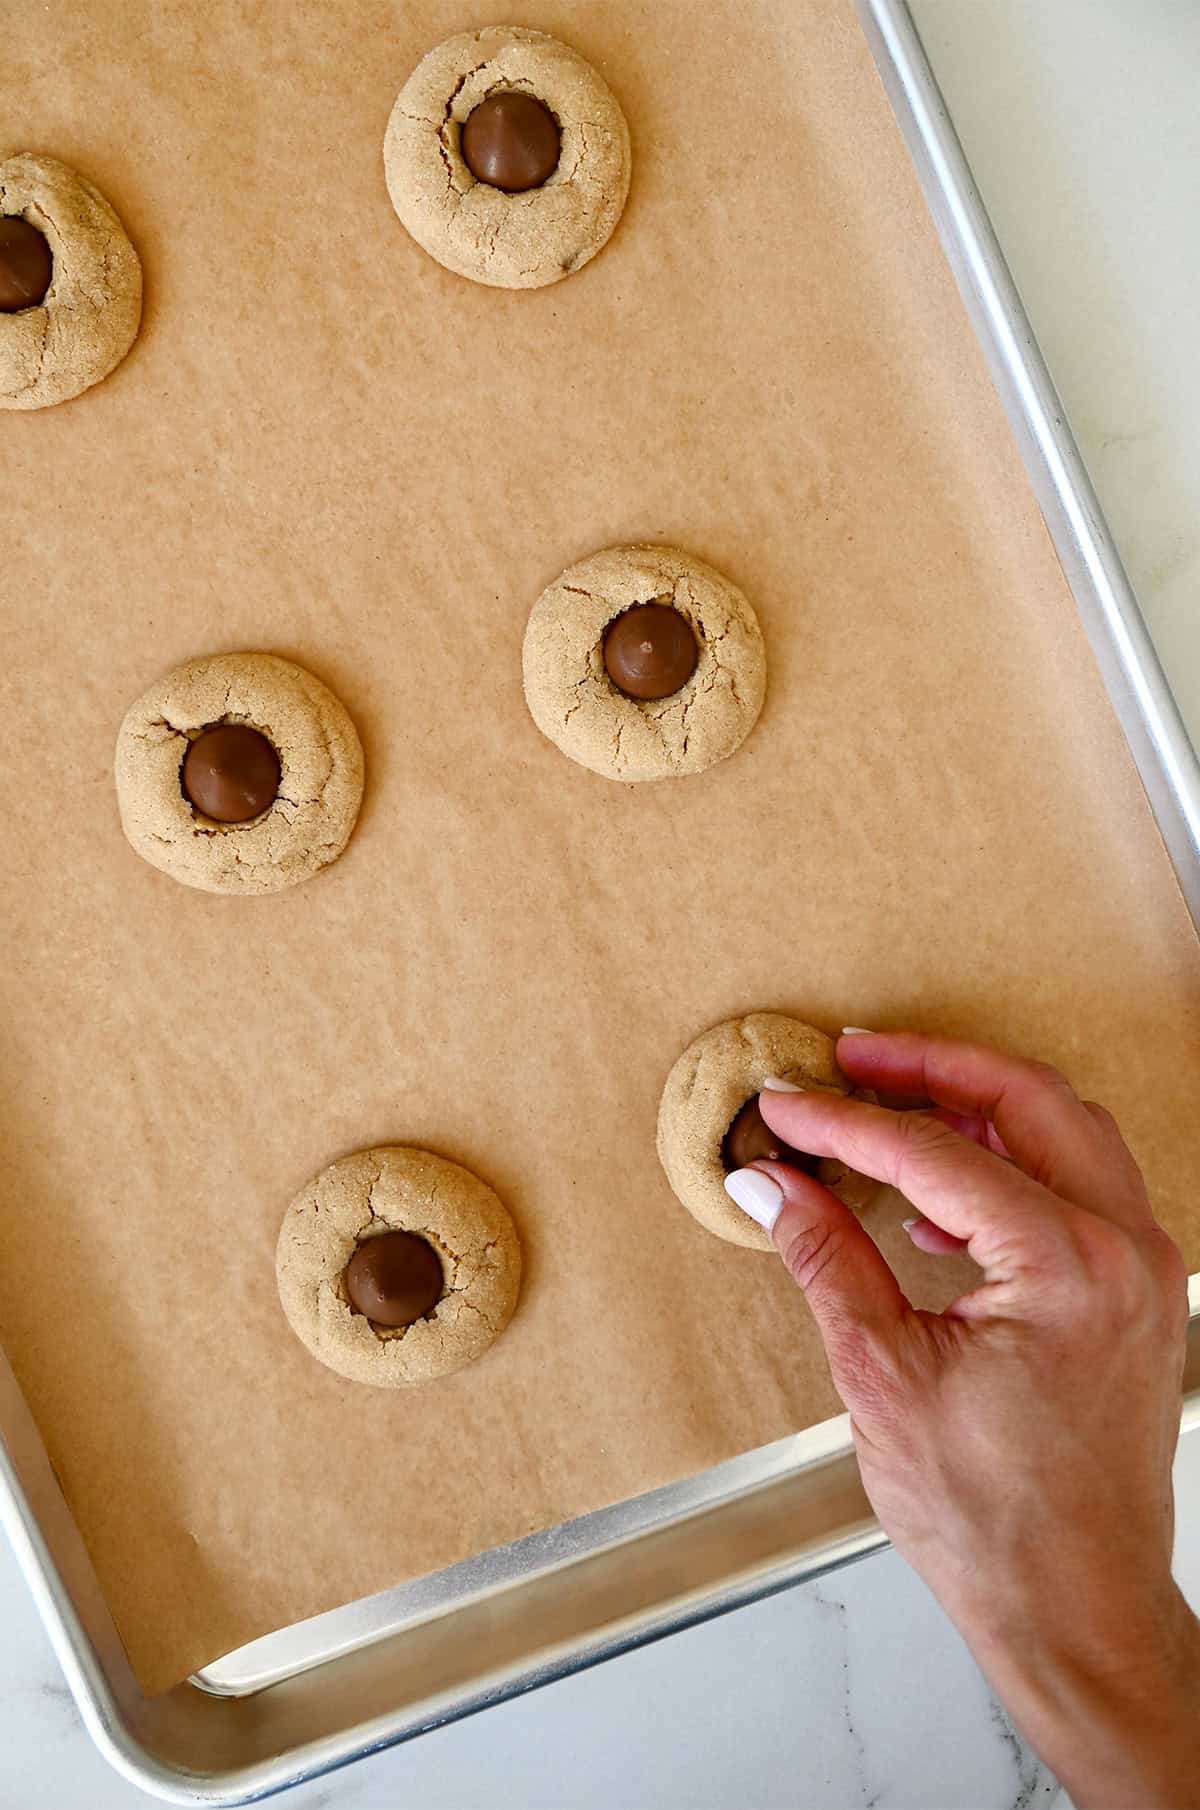
- Press in the Hershey’s Kiss. Remove the cookies from the oven and let them cool for 5 minutes, then gently press a chocolate kiss into the center of each one. The warm peanut butter cookie softens the chocolate just enough to create the classic “blossom,” and you’ll notice that the cookie will crack. That’s exactly what you want to see. Let the cookies finish cooling on the baking sheet before moving them to a rack. Then dig in… and try to eat just one!
- SEE NEXT PAGE
Announcements
