Step 1: Prepare the lemons
Wash the lemons very well because you will be using both the zest and the juice. Using a fine grater or a zester, remove only the yellow part of the peel. Avoid the white pith underneath because it can be bitter. Once you have the zest, cut the lemons in half and squeeze out the juice. You should have about one cup of fresh lemon juice. Strain the juice to remove any seeds or pulp.
Step 2: Set up a double boiler
To prevent the eggs from cooking too quickly, it is best to use a double boiler method. Fill a saucepan with about two inches of water and bring it to a gentle simmer. Place a heatproof bowl over the saucepan, making sure the bottom of the bowl does not touch the water. This will help the curd cook slowly and evenly.
Step 3: Combine the main ingredients
In the heatproof bowl, whisk together the eggs, egg yolks, sugar, lemon juice, and lemon zest. Stir until everything is well combined and the mixture looks smooth. This step helps the sugar dissolve and mixes the eggs evenly into the liquid.
Step 4: Cook the lemon curd
Place the bowl over the simmering water and start whisking slowly. Continue whisking for about 10 to 15 minutes until the mixture thickens. You will know it is ready when the curd coats the back of a spoon and leaves a clear line when you run your finger through it. Keep the heat gentle because high heat can cause the eggs to scramble.
Step 5: Add the butter
Once the curd thickens, remove the bowl from the heat. Add the softened butter pieces one at a time, stirring until each piece melts completely. The butter adds a silky smooth texture and a rich flavor to your lemon curd.
Step 6: Strain the curd
For a perfectly smooth lemon curd, pour it through a fine sieve into another clean bowl. This step removes any bits of cooked egg or zest, leaving you with a creamy and velvety curd.
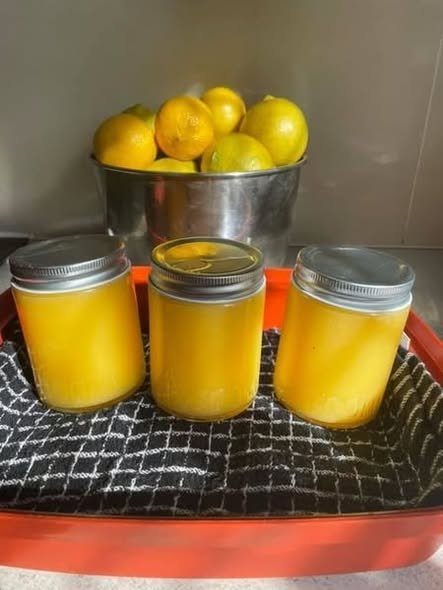
Step 7: Fill the jars
While the curd is still warm, use a clean funnel to pour it into your sterilized jars. Leave about half an inch of space at the top. Wipe the rims of the jars with a clean damp cloth to make sure there is no residue. Seal the jars tightly with the lids.
Step 8: Process the jars
Bring a large pot of water to a gentle boil and carefully lower the sealed jars into the water using tongs or a jar lifter. Make sure the jars are fully covered with water. Let them process for about 15 minutes. This step ensures that your lemon curd is safe for storage and will last longer.
Step 9: Cool and store
Remove the jars from the hot water and place them on a towel or cooling rack. Let them cool completely without touching them. Once cooled, check the lids to ensure they are properly sealed. You can store sealed jars in a cool, dark place for up to three months. After opening, keep the lemon curd refrigerated and use it within two weeks.
Why This Recipe Is Special
Lemon curd canning is special because it allows you to enjoy the bright and refreshing taste of lemons all year long. It captures the essence of the fruit in a creamy, smooth, and versatile spread that can be used in many ways. Unlike store-bought versions that often contain preservatives, homemade lemon curd is made with natural ingredients. You can feel confident that you are serving something pure and wholesome to your loved ones.
The flavor of lemon curd is a balance of sweet and tangy that feels energizing and comforting at the same time. It can instantly lift your mood and awaken your taste buds. It also pairs beautifully with many foods like scones, pancakes, biscuits, cakes, and even yogurt. This recipe is also perfect for those who love making homemade gifts. A small jar of bright yellow lemon curd tied with a ribbon can make a thoughtful and delicious present.
From a health point of view, lemon curd provides some vitamin C from the fresh lemon juice, and while it does contain sugar and butter, it can still be enjoyed in moderation as part of a balanced diet. Making it yourself also means you can control how much sugar you add, which is great if you prefer a lighter taste. It is a recipe that connects creativity, taste, and care, making it truly special.
Extra Tips for Better Taste
-
Use fresh lemons only. Bottled lemon juice lacks the bright aroma and fresh zest flavor that makes homemade lemon curd truly special.
-
Do not rush the cooking. Patience is key to a creamy texture. Slow cooking over low heat prevents the eggs from curdling.
-
Strain for a silky finish. This extra step ensures your curd is free from any lumps and has a beautiful, smooth consistency.
-
Add a touch of vanilla. A few drops of pure vanilla extract can round out the flavor and make the curd taste even richer.
-
Try other citrus fruits. You can mix a bit of lime or orange zest for a fun twist in flavor.
-
Use high-quality butter. The butter is what gives the curd its creamy richness, so choose a brand you like.
-
Store carefully. Always label your jars with the date of preparation and keep them in a cool, dark place for freshness.
-
Use it creatively. Besides spreading it on toast, try adding it between cake layers, in tart shells, or drizzling over ice cream.
Final Thoughts
Lemon curd canning is a joyful and rewarding kitchen project that fills your home with the wonderful scent of fresh citrus. The process is simple, and the result is a bright, golden spread that can be used in so many delicious ways. Whether you are preparing it for your family, for guests, or as a homemade gift, it always brings happiness.
Once you have made your first batch, you will see how easy and satisfying it is. Each spoonful reminds you of sunshine and freshness, no matter the season. The best part is knowing that you made it yourself with care, using real lemons and wholesome ingredients. With a few jars of lemon curd in your pantry, you will always have something cheerful and flavorful ready to brighten your day.
